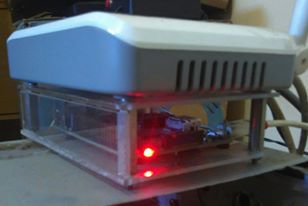
My Raspberry Pi under A Wireless Access Point
First, I want to say that I write this tutorial mainly for my own work’s documentation, because once we setting up a system for our need then there will be high probability that we need to do the same thing again in the future for maintenance. I had ever thought in the past that creating our own work’s documentation is not important since we can browse every tutorial on the net again if we need it someday, but my experience told me that it would often be very painful to find the required tutorials since what we do is usually integrating many things, where tutorials are spread in many different topics and many different resources.
Why We Need Our Own Backup and Why Raspberry Pi
Most of today’s web hosting server technology provides backup tools which is fully automated, but it is always useful to add redundant backup locally in our own office, keeping more peace in our mind when the remote backup gets into trouble. A Raspberry Pi single-board computer is employed for this purpose since its is low in cost and low in power consumption, and it is already available in my office for providing many other server functions for our needs (an ftp server for local storage and an ip-cam server for local recording, monitoring, and remote recording relay). How to set up a Raspberry Pi won’t be presented here, but for you who hasn’t been familiar with Raspberry Pi, you can learn everything about it here.
Configuring The Raspberry Pi
My Raspberry Pi has been installed with Raspbian OS, a descendant of Debian linux distro optimized for Raspberry system. To maximize the performance, the system is configured to disable the Desktop GUI on boot, a minimalist 16MB RAM split for GPU (which is almost never been used), and set the auto mounting of the external USB hard drive. The default installation of Raspbian on my raspberry Pi system is started with a desktop GUI and logged with “pi” user. To disable the destop GUI on every boot, start the terminal from the GUI then type the command “sudo raspi-config”, here the terminal window looks like:

Configuring Raspberry Pi
From the main interface of raspi-config tool, choose the third option (Boot Option) then press enter. Now the interface should display the sub menu of Boot Options, looks like this:
Boot Options
Choose the B2 option (Console Autologin Text console, automatically logged as ‘pi’ user) by down arrow to move the cursor to the option, then pres tab to select the <ok> button, then press enter to set up the selection and back to the main menu. From the main menu then pres tab to select the <finish> button and then press enter to accept the config, then a confirmation dialog will appear to ask to reboot, select <yes> and the system will reboot without starting the desktop GUI. Before deactivating the GUI you must check the ip-address of the Raspberry Pi system by “ifconfig” command, so you can log to the terminal using SSH (enable by default in raspbian installation) by the ip-address after the GUI is deactivated and the screen, mouse, and the keyboard have been detached. To set up the 16MB RAM for the GPU, you can use the command “sudo raspi-config” and go to the Advanced Options and you’ll find it.
Auto-Mounting An External USB Hard Drive
Now attach an external hard drive for the backup, and check if the drive is detected by command “sudo fdisk -l | grep sda”, now the terminal shows:

The line “/dev/sda1 63 312576704 312576642 149G 7 HPFS/NTFS/exFAT” tells us about the attached drive information. If there’s no information about the attached drive then try to reboot the system after the drive has been attached, the check again. If it’s ok then we can set the auto-mounting the hard drive on booting-up by command “sudo nano /etc/fstab” and the nano editor will be shown like this:

Auto Mount of The Hard Drive
Add the line /dev/sda1 /mnt to the bottom line (before the comment line #..), where the /mnt is the mouting point of the hard drive. The /mnt folder is the default folder provided by the system for the hard drive, but you can choose a different folder by creating the folder first. After editing the line then you can press ctrl+x to exit, don’t forget to save (with the same name) and reboot the system. See if after reboot the folder reflects the content of the hard disk.
Update: after reinstalling with the new version of Raspbian, the attached harddisk which is formatted with ntfs under Windows is always set automatically to read only, and the solution is by installing ntfs-3g (apt-get install ntfs-3g) on Raspbian, and then change the fstab line to “/dev/sda1 /mnt ntfs-3g defaults 0 0”.
Installing Rsync Server on Raspberry Pi
Rsync a file or folder synchronization tool that employ the benefit of delta transfer, where the data transfer is done only for the difference (the delta) of the two files. The synchronized file or folder can reside in the same computer or in the different computers (connected to the network). In order to synchronize files between two computers, we need to install the Rsync server on each computer. In the raspberry pi, since there are always lots of changes and updates coming, we first run the command:
sudo apt-get update && sudo apt-get upgrade
and then we install the required packages by command:
sudo apt-get install rsync
In the remote computer, the web hosting server (a VPS running a Centos OS in my case), we install the rsync server by command:
yum -y install rsync
The above yum command uses the -y option to automatically answer ‘yes’ to all questions during the installation process.
To test the installation on each computer, just type the rsync as the command, then the help of the rsync will be shown, indicating that the command is recognized and executed.
Testing The SSH
We need to run rsync over SSH for security, so the data transfer would be secured from being spied, and we need a public key authentication for SSH because the process of synchronization should run automatically without human intervention of typing the password. In may raspbian installation, I can’t log in directly to the root access ( i don’t know why) but we can set up the password for the root and switch the user from pi (the default user in my raspbian installation) to the root. To set the root password from pi user, use the command:
sudo passwd root
We will be prompted to type the new password for the root twice. After that, we can switch the user from pi to root by command:
su – root
The command will require the root password we have already set, type it and press enter, and now the command prompt will change into root (root@raspberry:~#). After switching the user into root,we can test the SSH by command
ssh -p 4321 root@remotehost.com
The number 4321 is the SSH port number (default 22) of the remote host, use your own setting. The remotehost.com can be changed to the remote host’s domain name or its ip address. If the ssh tool is fine then you’ll be asked for password and logged to the remote host through the Raspberry Pi, then type exit to return from the remote to the system.
Generate a Public Key on Raspberry Pi
The next step is generating the public key for SSH authentication. To generate the public key on the raspberry, use the command:
ssh-keygen -t dsa
Follow the prompt and just press enter to set without password and save the pair in the default location, in the /root/.ssh/id_dsa file for the private key and in the /root/.ssh/id_dsa.pub file for the public key. Now you can copy the generated public key from the Raspberry Pi to the remote host by this command:
ssh-copy-id -p 4321 -i /root/.ssh/id_dsa.pub root@remotehost.com
Again, use the proper port number by replacing the 4321 parameter with your own remote port setting. If the remote uses standard port 22 then we can omit this -p parameter. If testing the SSH has been done as in the previous step, you’ll be prompted to type the password and got logged to the remote host. Log out and try to log in again without password with this command:
ssh -p 4321 root@remotehost.com
If everything is okay then you’ll be logged without being asked for password.
Creating A Backup Script in The Raspberry Pi
A shell script is written to rsync from /home and /root folders into a local folder in the Raspberry Pi /mnt/vpsbak1 to be run daily. This means that in a random time, we always get a copy of the remote files which is synchronized between 0 – 24 hours ago, depending on the time we access it. In case of accidental update of a file, sometimes we need the previous version before getting updated, so we synchronize the vpsbak1 folder into vpsback2 folder locally before synchronizing the vpsbak1 to the remote host. This will provide an additional backup files which is synchronized to the remote files between 24-48 hours from any random time we access the vpsbak2 folder. Create the backup script by command:
nano rsync.sh
And write (or copy and paste) the following scripts:
echo ‘Local to local sync start at: ‘ > rsync.log
date >> rsync.log
rsync -az /mnt/vpsbak1 /mnt/vpsbak2 >> rsync.log 2>&1
echo ‘\nLocal to local sync stop at: ‘ >> rsync.log
date >> rsync.log
echo ‘\n\nRemote sync start at: ‘ >> rsync.log
date >> rsync.log
rsync -az -e “ssh -p 4321” root@remotehost.com:/root /mnt/vpsbak1 >> rsync.log 2>&1
rsync -az -e “ssh -p 4321” root@remotehost.com:/home /mnt/vpsbak1 >> rsync.log 2>&1
echo ‘\nRemote sync stopt at: ‘ >> rsync.log
date >> rsync.log
Exit the nano editor by ctrl+x and save to the same filename (rsync.sh).
Setting Up A Cron Job in The Raspberry Pi
To run the script periodically and automatically, we need to set up a cron job in the Raspberry Pi. Use the following command to run a cron job editor:
crontab -e
The cron job editor will be shown like this:
Cron Job Editor
Add the line “33 6 * * * sh /root/rsync.sh” in the bottom line, exit and save to install the new cron job. This means that the script (rsync.sh) will be executed at minute 33, on 6 o’clock every day, every month, and every year by the Raspberry Pi (by root user). Change this setting (the minutes and the hour) to select the best time, when bpth local and remote server is not in peak (busy) hours. Since website data is not only consisting of files but databases as well, we should set a cron job in the remote host to dump (using mysqldump) all the databases to the file inside /home or /root folder.